Master Instant Pot Hard Boiled Eggs: Creamy Yolks, Tender Whites
For too long, the quest for the perfect hard-boiled egg has felt like a culinary snipe hunt. We've all been there: stubbornly clinging shells tearing away half the whites, unsightly green rings around chalky yolks, and the sheer frustration of inconsistent results despite following "foolproof" methods. It's enough to make anyone abandon the dream of a simple, satisfying snack or salad topper. But what if we told you that the elusive, perfectly peeled, creamy-yolked hard-boiled egg isn't a myth? It's real, it's consistent, and it's waiting for you in your Instant Pot.
Forget everything you thought you knew about boiling eggs. Your electric pressure cooker, the culinary hero of countless kitchens, is about to revolutionize your approach to this fundamental food. The Instant Pot doesn't just promise easy-peel hard-boiled eggs; it *delivers* them, every single time, with whites that are firm yet tender and yolks that are vibrant yellow and irresistibly creamy. This isn't just another kitchen hack; it's a game-changer, making the
instant pot hard boiled eggs recipe an essential part of your cooking arsenal.
The Unbeatable Advantage of Instant Pot Hard Boiled Eggs
You might be wondering, what makes the Instant Pot so special for hard-boiled eggs? The answer lies in the unique cooking environment created by pressure cooking. Unlike traditional stovetop methods where eggs are submerged in boiling water, the Instant Pot uses steam under pressure. This mechanism is key to achieving consistent results and, crucially, effortless peeling.
One prevailing theory suggests that the pressurized steam penetrates the egg's shell during cooking, creating a thin layer of steam between the albumen (egg white) and the inner membrane. This delicate separation prevents the egg white from bonding tightly to the shell, allowing it to slip away with remarkable ease once cooked and chilled. Another perspective credits the rapid cooking and cooling process for affecting the pH balance of the egg, further aiding in the separation. Whatever the exact scientific reason, the outcome is undeniable: smooth, pristine hard-boiled eggs without any of the struggle.
This method works wonders for all types of eggs – whether they're farm-fresh or several weeks old, white or brown. The consistency is truly astonishing, eliminating the guesswork and frustration that often accompanies traditional methods. For a deeper dive into the science and consistent results, you'll find more insights in
Unlock Perfect, Easy-Peel Instant Pot Hard Boiled Eggs Every Time.
Crafting Your Perfect Instant Pot Hard Boiled Eggs: The Method Explained
The foundational method for hard-boiled eggs in the Instant Pot is often referred to as the "5-5-5" technique. This popular formula involves 5 minutes of high-pressure cooking, followed by a 5-minute natural pressure release (NPR), and finally, a 5-minute ice bath. While this is a good starting point, many, including ourselves, have found that a slight adjustment can yield an even more desirable texture: perfectly tender whites and gloriously creamy yolks.
Our preferred
instant pot hard boiled eggs recipe often leans towards a
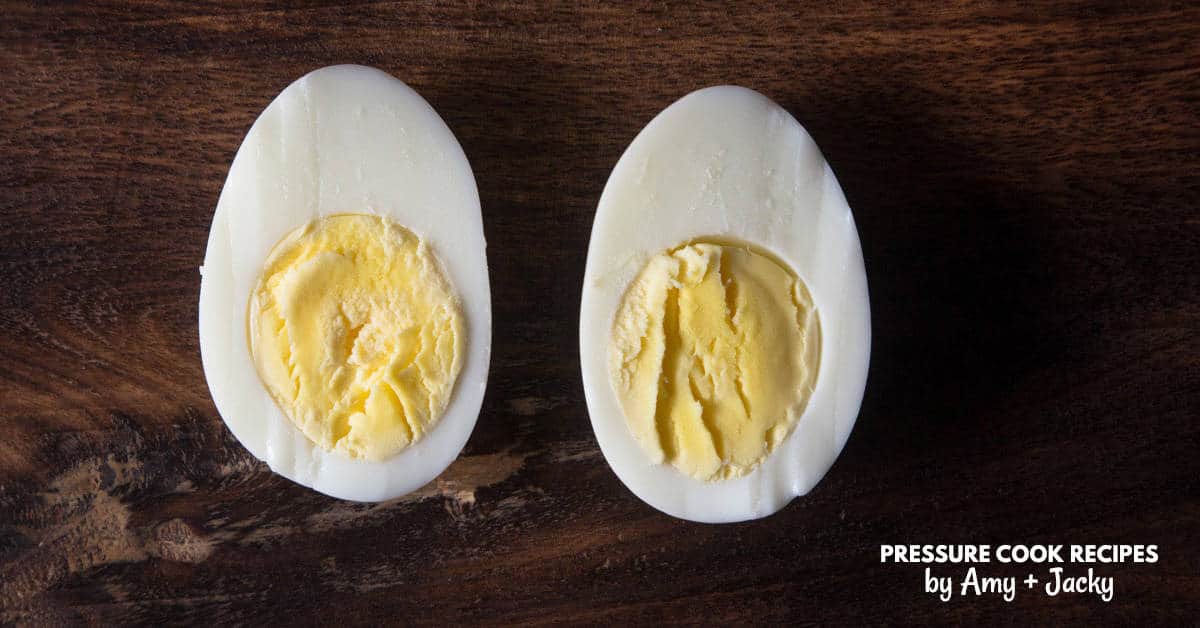
4-minute cook time. At 4 minutes, the whites achieve a firm yet soft consistency, and the yolks are cooked through but retain a wonderfully creamy, almost custard-like texture, without any hint of dryness or the dreaded chalkiness. While 5 minutes will certainly give you a firm, fully cooked yolk, it can sometimes lead to a slightly rubbery white and a drier yolk. We encourage you to experiment with both to discover your personal preference!
For those using a stovetop pressure cooker, which typically reaches higher pressures and cooks food more rapidly, a quicker 3-minute cook time is often sufficient to achieve similar results.
Step-by-Step: Your Go-To Instant Pot Hard Boiled Eggs Recipe
This detailed recipe is designed for electric pressure cookers like the Instant Pot.
Ingredients:
* 6-12 large eggs (any color, any age)
* 1 cup cold water
Equipment:
* Instant Pot (3-quart, 6-quart, or 8-quart)
* Trivet or steamer basket (the one that came with your Instant Pot works perfectly)
* Large bowl for an ice bath
* Slotted spoon or tongs
Instructions:
1.
Prepare the Pot: Pour 1 cup of cold water into the bottom of your Instant Pot's inner pot. This water will create the steam necessary for cooking.
2.
Arrange the Eggs: Place the trivet or steamer basket inside the pot. Carefully arrange the eggs on the trivet in a single layer if possible. If you're cooking a larger batch (more than 7-8 eggs), you can stack them gently, but avoid overcrowding to ensure even cooking.
3.
Seal and Cook: Secure the lid on your Instant Pot, ensuring the sealing valve is set to "Sealing." Select the "Manual" or "Pressure Cook" setting, then set the cook time to
4 minutes on High Pressure.
4.
Natural Release (NPR): Once the cooking cycle is complete, the Instant Pot will beep and switch to "Keep Warm." Allow the pressure to release naturally for
5 minutes. This is crucial for preventing the eggs from overcooking and helps stabilize the internal temperature.
5.
Quick Release (QR): After 5 minutes of natural release, carefully switch the sealing valve to "Venting" to quick release any remaining pressure. Once the floating valve drops, it's safe to open the lid.
6.
The Essential Ice Bath: Immediately transfer the cooked eggs from the Instant Pot into a large bowl filled with ice water. Let them cool in the ice bath for at least
5 minutes (you can go up to 10-15 minutes if you like). This critical step stops the cooking process, helps set the whites, and aids significantly in easy peeling. Do not skip the ice bath!
7.
Peel and Enjoy: Once chilled, gently tap an egg on a hard surface and roll it to crack the shell all around. The shell should then slip off effortlessly under cool running water. Your perfectly cooked, creamy-yolked Instant Pot hard boiled eggs are ready to enjoy!
Tips for Instant Pot Hard Boiled Egg Perfection & Beyond
Achieving perfection with your
instant pot hard boiled eggs recipe is simple, but a few additional tips can elevate your experience:
*
Don't Skip the Ice Bath: We can't stress this enough. The rapid cooling immediately halts the cooking process, preventing the residual heat from overcooking your yolks and ensuring that beautiful creamy texture. It also causes the egg white to contract, further separating it from the shell membrane, making peeling a breeze.
*
Experiment with Cook Times for Your Ideal Yolk:
*
3 Minutes: For a jammy, slightly runny yolk, perfect for ramen or toast.
*
4 Minutes: Our recommended time for a creamy, tender white and fully set but still moist and vibrant yolk.
*
5 Minutes: For a firm, fully cooked yolk, ideal for classic deviled eggs or egg salad where a very firm consistency is desired.
*
Number of Eggs Doesn't Matter: Whether you're cooking two eggs or a dozen, the cooking time and water amount remain the same in the Instant Pot. This consistency is one of its greatest advantages.
*
Storage: Peeled hard-boiled eggs can be stored in an airtight container in the refrigerator, ideally submerged in a little water, for up to 5 days. Unpeeled eggs will last for up to 7 days in the refrigerator.
*
Serving Suggestions: The versatility of hard-boiled eggs is endless! Enjoy them as a quick, protein-rich snack, slice them into salads, mash them for classic egg salad sandwiches, halve them for delectable deviled eggs, or use them as a topping for avocado toast or ramen bowls.
*
Know Your Instant Pot: While the 4-minute cooking time is widely successful, slight variations can occur between different Instant Pot models or even due to altitude. Don't be afraid to fine-tune your timing by 30 seconds to a minute to achieve your absolute perfect result. For more advanced strategies and to troubleshoot common issues, be sure to read
Fast & Flawless: The Instant Pot Hard Boiled Egg Method That Works.
Gone are the days of guessing games and culinary disappointment. With your Instant Pot and this foolproof
instant pot hard boiled eggs recipe, you're not just making eggs; you're mastering them. Embrace the ease, revel in the creamy yolks and tender whites, and rediscover your love for this humble, nutritious, and endlessly versatile food. Your meal prep, snacks, and salads will thank you.